Pages

Thursday, February 10, 2011

CEiMB - Shrimp Fried Rice

This week's CEiMB recipe, courtesy of Sarah at Sarah's Kitchen Adventures, is Shrimp Fried Rice. Now, I love shrimp and I love fried rice, so I was very excited to try this recipe out. Fried rice isn't difficult, but it does take some planning. It is crucial that the rice you use is not fresh. If you use fresh rice, it comes out wonky and doesn't taste like fried rice at all. Trust me, I've made that mistake before, so this time I cooked my rice the night before I planned on making this dish.

First, I cooked up the ginger, green onions, and shrimp in canola oil.


To that, I added the cabbage. I apparently missed the note to cut the cabbage into three inch pieces, so mine were a tad big. Oops. After the shrimp pinked up, I set all that to the side and heated up some toasted sesame oil in the pan. I then added the cold brown rice and fried it up. I added the shrimp/cabbage mixture to the rice along with some soy sauce.

Terrible picture, but the dish itself turned out very well! My husband asked where the peas and carrots were, so I will add those in next time.

Thursday, February 3, 2011

CEiMB -- Four Cheese Baked Penne

This week's CEiMB recipe, hosted by Lindsey of 71 Cookbooks, is Four Cheese Baked Penne. I was torn about making this recipe. I love pasta and cheese, and especially love the two together in a baked pasta. However, I HATE cottage cheese. The consistency makes me shudder and feel ill. Okay, I'm exaggerating a bit, but I avoid cottage cheese at all costs. But I decided to put on my big girl pants and try it in this recipe. It was a good decision.

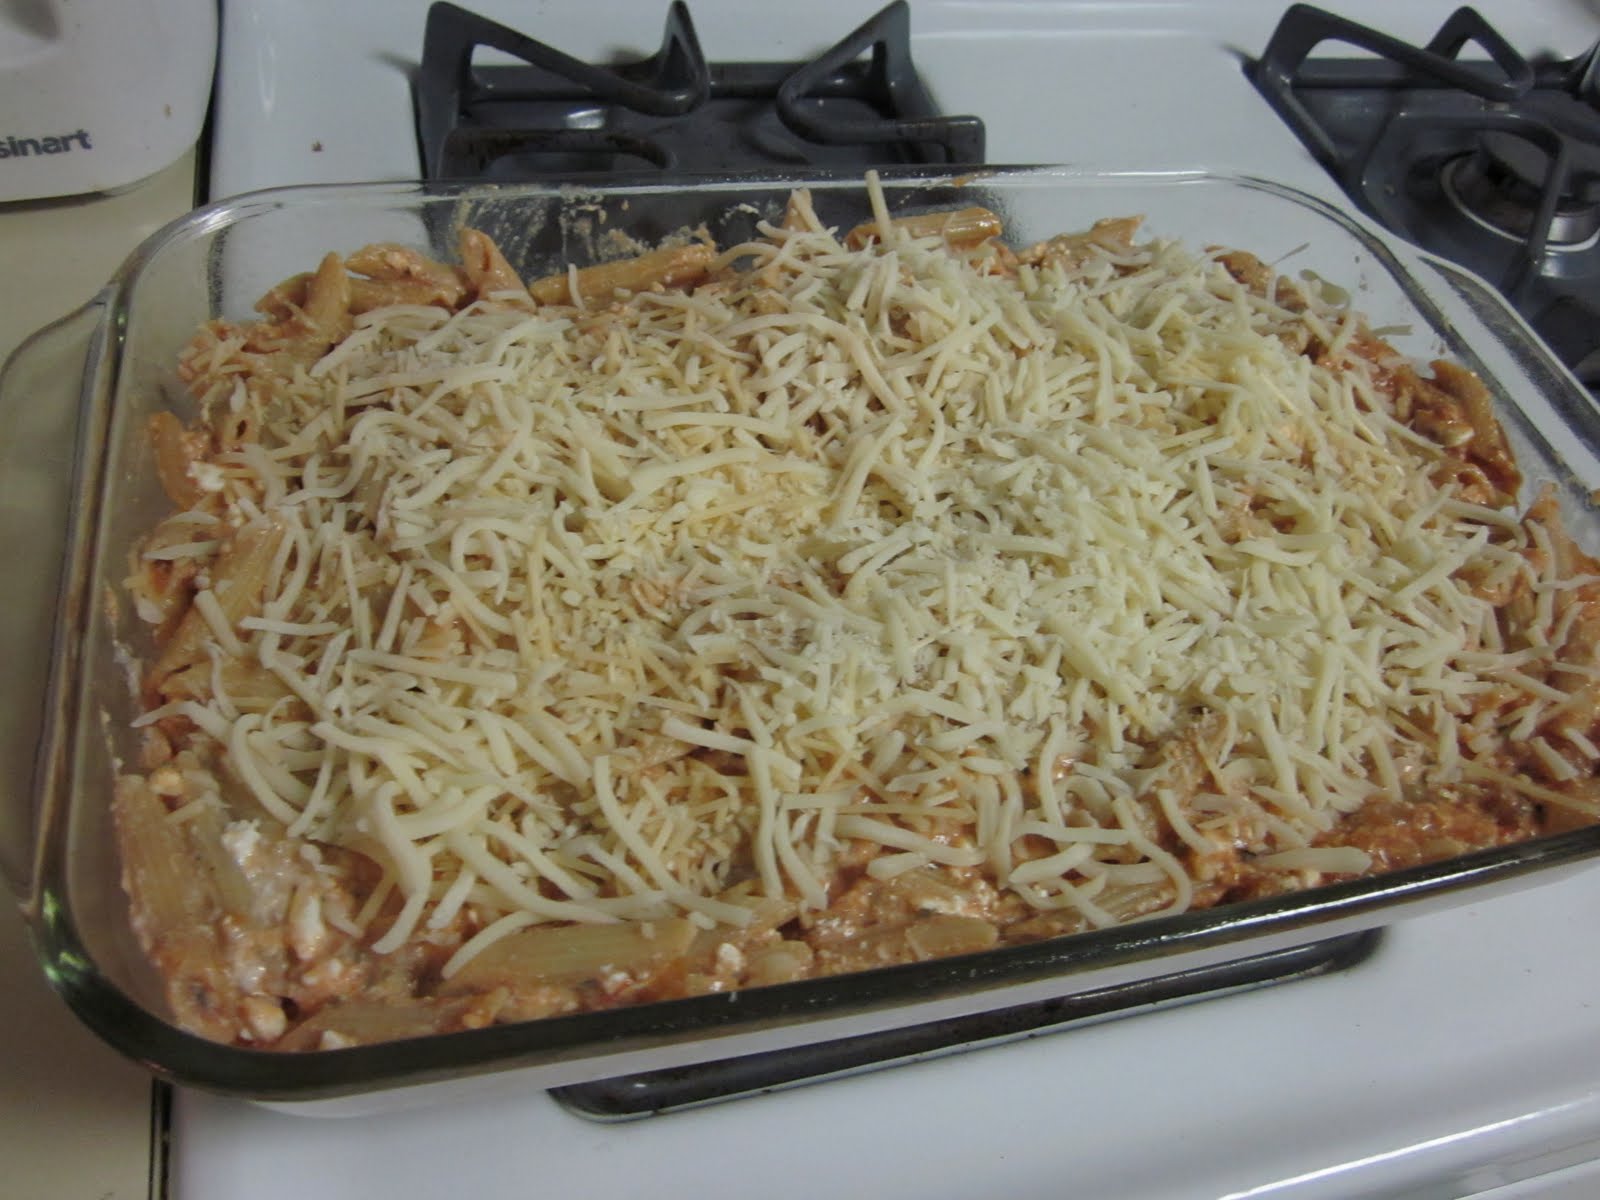
While I boiled the pasta, I chopped up my onion and garlic and combined the cheeses. I may or may not have said "Blech, you are so gross looking!" out loud when putting in the cottage cheese, but I got over it. Then it was time to take the pasta out of the pot and put the onions, then garlic, then tomatoes and herbs in. I didn't have rosemary, so I used some Italian seasoning blend. This may have been a bit too much oregano. After the sauce simmered for 10 minutes, back in went the pasta along with the cheese mixture. It was topped off with the remaining mozzarella and some parmesan. I noticed that Kraft shredded cheese is now smaller than 2 cups--they are only 1 3/4 cups now! In protest, I added in an extra 1/2 cup of mozzarella, which made the dish less healthy but eased the pain of paying the same amount for 1/4 cup less cheese.

I didn't snap a lot of pictures since I was focused on getting everything together, but here's a before picture.


And an after pic (but before serving).


I made this recipe on a weeknight, but next time I will save it for a weekend since it is a little time consuming. However, most of that time is waiting time and it's incredibly easy to make. Next time, I will also use fresh parsley or omit it entirely.

Wednesday, January 26, 2011

CEiMB -- Fettuccine with Creamy Red Pepper-Feta Sauce

I am a former feta hater. I hated the texture of it, the smell, and definitely the taste. That is, until I went to Greece in June for a few days and realized that feta can be good! Rich, creamy, and very much NOT like chalk. Since then, I've made more of an effort to try out different fetas to find some here that I like. So for this week's Craving Ellie in My Belly, I decided to try out her Fettuccine with Creamy Red Pepper-Feta Sauce.


The recipe was easier than I expected. While I chopped up the onion and garlic, I managed to convince my husband to drain and cut up the roasted red pepper and portion out the feta.


I quickly realized that my mini food processor was not going to cut it, so I decided to be "adventurous" and use handhold blender I usurped (okay, asked for and was given) from my parents. It was very easy to use and I didn't make a huge mess of my kitchen. Of course, I have no pictures of my blended success since at that point, the pasta was done and it was ready to serve!


I should mention that while the sauce was blending, I heated up some sundried tomato chicken sausage on the stove to throw into the pasta. Despite the unappetizing color of the sauce, it was a definite success. We had enough leftover to have for lunch at work the next day which is always a good thing.


I hope you all enjoyed this recipe as much as I did. I would definitely make this again, possibly exchanging the sausage for shrimp--not that it needed either.


Ingredients
2 tablespoons olive oil
1 small onion, chopped
2 to 3 garlic cloves, peeled and chopped
1 (16-ounce) jar roasted red peppers, drained and chopped
1/2 cup low-sodium chicken stock or vegetable stock
1 cup crumbled feta cheese or a 6-ounce block
1 pound whole-wheat fettuccine
Salt
Freshly ground black pepper
2 tablespoons chopped fresh parsley leaves


Directions
Heat the oil in a heavy skillet over medium-high heat. Saute onion and garlic until soft, about 10 minutes. Add roasted peppers and saute until heated through. Remove from heat and let cool slightly. Place mixture in the bowl of a food processor with stock and all but 2 tablespoons of the feta. Process until combined and smooth, about 30 seconds. Cook pasta according to package directions.Drain, reserving 1/2 cup pasta water. Toss pasta with sauce, adding pasta water by the tablespoon, if needed. Sauce should cling nicely to pasta. Season with salt and pepper, to taste. Divide amongpasta bowls. Sprinkle with parsley and remaining feta cheese.


Wednesday, January 12, 2011

CEiMB -- Walnut and Dried Cherry Bars

Hello again! After quite a long absence, I am back. Not that I really went anywhere. Things were hectic at work and with the holidays, and I let the blog fall to the way side. But I am back and ready to cook, though I am considering a move to Word Press from Blogger. Stay tuned for more info.

This week's recipe for CEiMB, Walnut and Dried Cherry Bars is from Heide of Chez Zero. Like all of Ellie's recipes, this one fits in great with the whole "Eat better" resolution so many of us have. The ingredient list appeared intimidating at first, but the recipe was incredibly simple. I used my mini food processor to chop up my walnuts, which was fantastic. My grocery store only had untoasted wheat germ and I didn't feel like toasting it so I used it as is. I also didn't have dried cherries, but I did have cherry flavored Craisins so I used those.

The ingredient mixture is baked in a square baking dish, as seen below. The oats make it look like I just took a giant bowl of oatmeal and dumped it in a dish.


While the bars baked, I did dishes--by far, the most difficult part of the whole thing. When the baking time wound down, I cooked up the apricot preserves. I didn't realize that my "all fruit" jelly had actual fruit pieces. No matter, I still brushed the melted preserves on top of the hot baked energy bars.

I didn't snap a pic of the cut bars, but I am eating one as part of lunch right now--delicious! I will definitely be eating more of these, and will make them again with different dried fruit and preserves.

Thursday, November 25, 2010

CEiMB -- Baked Shrimp with Tomatoes and Feta

Well, today is Thanksgiving in the U.S. For Craving Ellie in My Belly this week, we can choose any Ellie recipe we want. Since I'm sure there will be lots of delicious, heavy food at Thanksgiving, I decided to pick a light seafood dish--Baked Shrimp with Tomatoes and Feta from The Food You Crave (page 234). This dish is amazingly simple yet delicious and will definitely be a regular in my house.

Basically, you cook up some onion and garlic in olive oil, then add two cans of diced tomatoes until the mixture thickens. Throw in some shrimp, parsley, dill, salt, pepper, and feta, and put the whole thing in a 425 degree oven for 12 minutes. That's it!


I decided to serve the shrimp with brown rice, but it would also be great with pasta.

Thursday, November 11, 2010

CEiMB -- Whole-Wheat Pasta Salad with Walnuts and Feta

This week's CEiMB recipe is whole-wheat pasta salad with walnuts and feta hosted Kayte of Grandma's Kitchen Table. I may not have taken many photos, but I loved it! While the pasta boiled, I chopped up spinach, onion, feta, as well as the sun dried tomatoes I added in. I set the mixture to the side while I toasted and chopped the walnuts before adding them to the party.

The dressing was incredibly easy to make, though I used olive oil rather than walnut oil. I doubled the amount of dressing and combined everything.


It was very tasty that evening, as well as for lunch the next day. The only thing I would change is using less onion. I used half of a small/medium red onion and it was overpowering--and I LOVE onions. I also added some dried cranberries to the lunch leftovers and it was delicious. I will definitely be making this dish again.

Friday, October 29, 2010

CEiMB -- Spaghetti Frittata

Growing up, one of my aunts would always make a spaghetti pie for holiday dinners. It always scared me, so I never tried it. When I saw this week's recipe for Spaghetti Frittata, hosted by Marthe at Culinary Delights, it reminded me of that spaghetti pie. I knew I had to make it and finally try it out!

Since the past few weeks at work have been hectic, this was a good recipe to make because it was so straightforward and uncomplicated. While I cooked the pasta, I chopped up my onion and set it to cook, then chopped up the spinach, sundried tomatoes, and garlic to add to the pan. After combining the pasta and sauce, I added that mixture to the veggies and cooked up. Finally, I added the eggs. The recipe calls for broiling the mixture after adding cheese, but I wasn't 100% sure that my pans could handle it so I put the oven temp up as high as I knew I could. It took a bit longer, but it seemed to work.

Pre-oven:


Post-oven:


I was scared it was going to be some weird eggy pasta "thing" but it was good! I wish I had added more salt and maybe some herbs for additional flavor, but my husband liked it as it was.

Thursday, October 14, 2010

CEiMB--Apple Brown Betty

So this week was my pick for Craving Ellie in My Belly--Apple Brown Betty. Even better, I was able to make this recipe over the weekend with my mom since my parents were visiting! There was quite the selection of apples at the farmers market. Even though the recipe calls for Golden Delicious apples, I decided to use Nittany apples from the market--mostly because my husband went to Penn State and is a huge PSU football fan (if I had known how poorly the game was going to go later that day, I may have chosen differently!).

This recipe was quite easy to put together. The most difficult part was thinly slicing the apples, but even that became easy once I remembered I owned a mandoline slicer (that is why my cut up apples all look different). I added the apples, apple cider (also from the farmers market and crazy delicious), some of the brown sugar, vanilla, and cinnamon to a large pan to cook up.


I was concerned that the apples wouldn't fit in my pie dish, but they cooked down nicely and fit into my pie dish without any trouble.


Since I was enjoying time with my family, I didn't realize until it was too late that I did not have any bread at home. Luckily for me, I did have some panko bread crumbs! I combined those with melted butter, brown sugar, and cinnamon for the topping, and popped the whole thing into the oven.


After 30 minutes, the topping was a nice, golden brown. Dessert time!


My husband surprised us by picking up some low-fat vanilla ice cream to go with the Apple Brown Betty. It was a great combination, especially since it was a pretty warm evening.


The recipe makes a lot of servings, definitely more than six unless you have pretty big portion sizes. The four of us each had some, and I actually ate the Apple Brown Betty cold later on in the week. It is delicious cold as well, even without the ice cream!

You can find the recipe on the Food Network site for Ellie's Apple Brown Betty, as well as on page 241 of So Easy.

Thursday, September 30, 2010

CEiMB: Baked French Toast

This week's CEiMB recipe was Blueberry Almond French Toast, hosted at Chez Zero. As you may gather from the post title, it's a baked French toast dish, and one where I left out two of the main ingredients--blueberries and almonds. Why would I do such a thing? Well, my husband doesn't care for almonds. Since raspberries were on sale, I swapped them out for blueberries. Sometimes, recipe tweaks are great. In this case, I should have stuck closer to the original.

Since there are only two of us, I sort of halved the recipe. I kept the bread, vanilla, and cinnamon amounts the same, but decreasing everything else.

Bread, meet egg/milk/etc. mixture


One thing I really liked about this recipe was that it was prepared the night before. It was especially helpful since I had quite a few loads of laundry to take care of the morning I made this.
After pouring the egg/milk/etc. mixture over the baguette pieces, I added some raspberries, covered the dish, and popped it in the fridge for the night.


The next morning, I put the French toast into the oven. Truthfully, I panicked that the cold glass dish would break apart in the hot oven, so I heated it up in the microwave at 30 second intervals to take the chill off. I wouldn't recommend it.

Since I was distracted by laundry (and thoughts of exploding glassware), I forgot to top my baked French toast with brown sugar until there were only about 15 minutes left.


I baked for about 50 minutes, then cut out some pieces to eat for breakfast.


It was okay. The raspberries' tartness was a bit overwhelming in the dish, so poor choice on my part there. I put in 1/3 cup of real maple syrup, but couldn't taste it at all. I'm not giving up on baked French toast just yet, but I may try making the actual recipes (blueberries, almonds and all) in the future.


Saturday, September 11, 2010

BBQ Chicken Pizza

While I love being able to save draft blog posts, I need to remember to actually go back and finish posts I start. I promise I wasn't holding my leftover BBQ chicken for a month. Though I suppose we can pretend I froze it, and then thawed it for this pizza!

I have wanted to try out Trader Joe's pizza dough for quite awhile and I figured no better way to use up some BBQ pulled chicken leftovers than by making a pizza! I also look for any excuse to eat pizza.

Stretching out the dough took longer than I thought it would, but it was pretty fun. The crust may not be even, but I managed not to tear it. After shaping the dough into what looked sort of like a pizza crust, I spread some BBQ sauce over it. I then added some of the leftover BBQ pulled chicken. I don't normally like heavily topped pizzas, but I figured it is BBQ chicken pizza.


Then it was time for my favorite part of any pizza--the cheese. I used a mixture of mozzarella and colby jack because we had open bags of both in the fridge. I may have overindulged in the cheese a bit.


About ten minutes later, the pizza was done! To be fair, I put it under the broiler for a minute to try and crisp up some of the cheese on top before serving.


If I were a good or experienced blogger, I'd have some sort of recipe to share. Alas, I am a lazy bum blogger who winged the whole thing. Winged...wings...buffalo chicken pizza may be next.


Macaroni Salad

As promised, here's the info on the macaroni salad I paired with my slow cooker pulled chicken. Growing up, I would not touch macaroni salad. I was a picky eater in general, but all the mayo in macaroni salad made me want to run and hide. At some point as an adult, I must have tried macaroni salad and it wasn't bad! In fact, I sort of liked it.

Since the husband is not a fan of store bought macaroni salad, I decided to try my hand at making it myself. The hardest part of making macaroni salad is chopping up the vegetables. Well, that's the second hardest part. The hardest thing is waiting to eat it!

Step one: combine all ingredients except pasta.


Step 2: Add pasta, stir, and put in fridge.

Step 3. After waiting patiently, serve and eat!


Macaroni Salad, adapted from Classic Macaroni Salad

2 cups uncooked elbow macaroni
1/2 cup light mayonnaise
2 tablespoons distilled white vinegar
2 tablespoons white sugar
1 tablespoon and 3/4 teaspoon prepared yellow mustard
3/4 teaspoon salt
1/4 teaspoon ground black pepper
1/2 large red onion, chopped
1 stalk celery, chopped
1/2 green bell pepper, seeded and chopped
1 tablespoon relish
dash of paprika

While pasta cooks, mix all other ingredients. Add cooked and drained pasta to mix and combine. Refrigerate for at least 4 hours.

BBQ Pulled Chicken

I love using the slow cooker. The idea that you can do the prep work in the morning, then relax or run errands, and with little effort your meal is ready a few hours later. Unfortunately, most slow cooker recipes have cooking times of 10 hours or less. During the week, I am away from home for more than 10 hours so it's not ideal. That's why most of my slow cooking is done over the weekend.

I was in a BBQ mood, but we don't have a grill. Hmmm what to do? BBQ slow cooker pulled chicken! Small list of ingredients, not much work--perfect.

I added frozen chicken to my slow cooker while I whipped up the sauce from BBQ sauce, Italian salad dressing, brown sugar, and Worcestershire. I poured the sauce over the chicken, closed up my slow cooker, and did my own thing for about three hours.


After three hours on high, I shredded the chicken. This was, by far, the most labor intensive part of the meal. My slow cooker is not very large, so I shredded the chicken in a bowl and added it back to the slow cooker.


After the shredding, I let everything cook for another hour on low.


Then it was time to eat! Since it was so nice out, we dined on our balcony. I made pulled chicken sandwiches using, you guessed it, pulled chicken and a toasted bun. To complete the meal, I also served up maple baked beans (Harris Teeter organic brand) and macaroni salad (recipe forthcoming).


Gratuitous BBQ pulled chicken shot:


The chicken turned out fantastic! Even better, it made quite a bit of chicken so we were able to eat leftovers for several meals, including a BBQ chicken pizza (post also forthcoming). Since we're only a household of two, the recipe may have made a bit too much, so I might use 1-2 less chicken breasts but keep the sauce ingredient quantities the same.


Adapted from Zesty Slow Cooker Chicken Barbecue and reviewer comment

5 frozen skinless, boneless chicken breast halves
1 (18 ounce) bottle barbeque sauce
1/2 cup Italian salad dressing
1/4 cup brown sugar
2 tablespoons Worcestershire sauce

Place chicken in a slow cooker. In a bowl, mix 2/3 of the barbecue sauce, Italian salad dressing, brown sugar, and Worcestershire sauce. Pour over the chicken.

After cooking for 2.5 to 3 hours on High, shred the chicken breasts and mix into sauce.

Cook for an additional hour on Low. Mix in remaining BBQ sauce before serving

  • .

Buttermilk Pancakes

Who posts about pancakes on a Monday night? Someone who's been watching football all weekend, that's who (also the same person who's watching football right now--J-E-T-S JETS JETS JETS!). I actually made these pancakes a few weekends ago when trying to finish off the big container of buttermilk I had.

Guess where I went to find a buttermilk pancakes recipe? Allrecipes.com! You'd think it was the only food website I knew about. After comparing a few recipes, I decided to go with Mom's Buttermilk Pancakes (if you put "Mom" in the name of your recipe, I will probably try it).

I combined the dry ingredients, then combined the wet ingredients. That was a giant FAIL. The recipe calls for melted butter. Since I wasn't planning ahead, I quickly melted butter in the microwave. So the butter was hot when it went into the egg and buttermilk mixture. Which made my eggs scramble. Blech blargh d'oh. Attempt two went more according to plan, and I mixed the wet with the dry. I'm glad the recipe warned me it would be lumpy and not to overmix because I would have assumed I screwed up the egg thing again.


I decided to break out the electric griddle we got for Christmas since it has a lot more space than any of our pans. It would have been great had I turned the temperature up correctly to preheat my griddle. Whoops, part 2.


Luckily, the e-griddle heats up pretty quickly and the pancakes were salvageable.


The color is incredibly uneven, but I'm just happy they were cooked through.


The final result was definitely a fluffy pancake, but not incredible. If I made these again, I will do a better job about prepping my ingredients and mixing my wet ingredients more thoroughly before adding to the dry ingredients. I might also add in some sugar, or look for a recipe that is less tangy since C2 and I both prefer sweeter pancakes over more savory pancakes.

Ingredients
1 cup flour
1 teaspoon salt
1 teaspoon baking soda
1 egg
1 1/8 cups buttermilk
2 tablespoons butter, melted

Preheat and lightly grease a large skillet or electric griddle.

Mix the flour, salt, and baking soda together in a bowl. Add the egg, buttermilk, and butter; stir together but not super well. It should be lumpy and, well, weird looking.

Drop 1/3 cup of the batter onto the griddle. Cook until golden brown on each side. You'll know it's time to flip when the pancakes start bubbling, about 2 minutes per side.


Vegetables in sweets?

A coworker has brought her zucchini bread in on several occasions. I've always enjoyed it, but have never made it myself. Until now--I mean, if I'm going to learn to love vegetables, I should love them in all forms.

Since my coworker likes to brag about her recipe, I decided to find one online to try out. I went to AllRecipes.com, as usual, and found "Mom's Zucchini Bread." After browsing the reviews, I made a few tweaks to the recipe to make it mine.

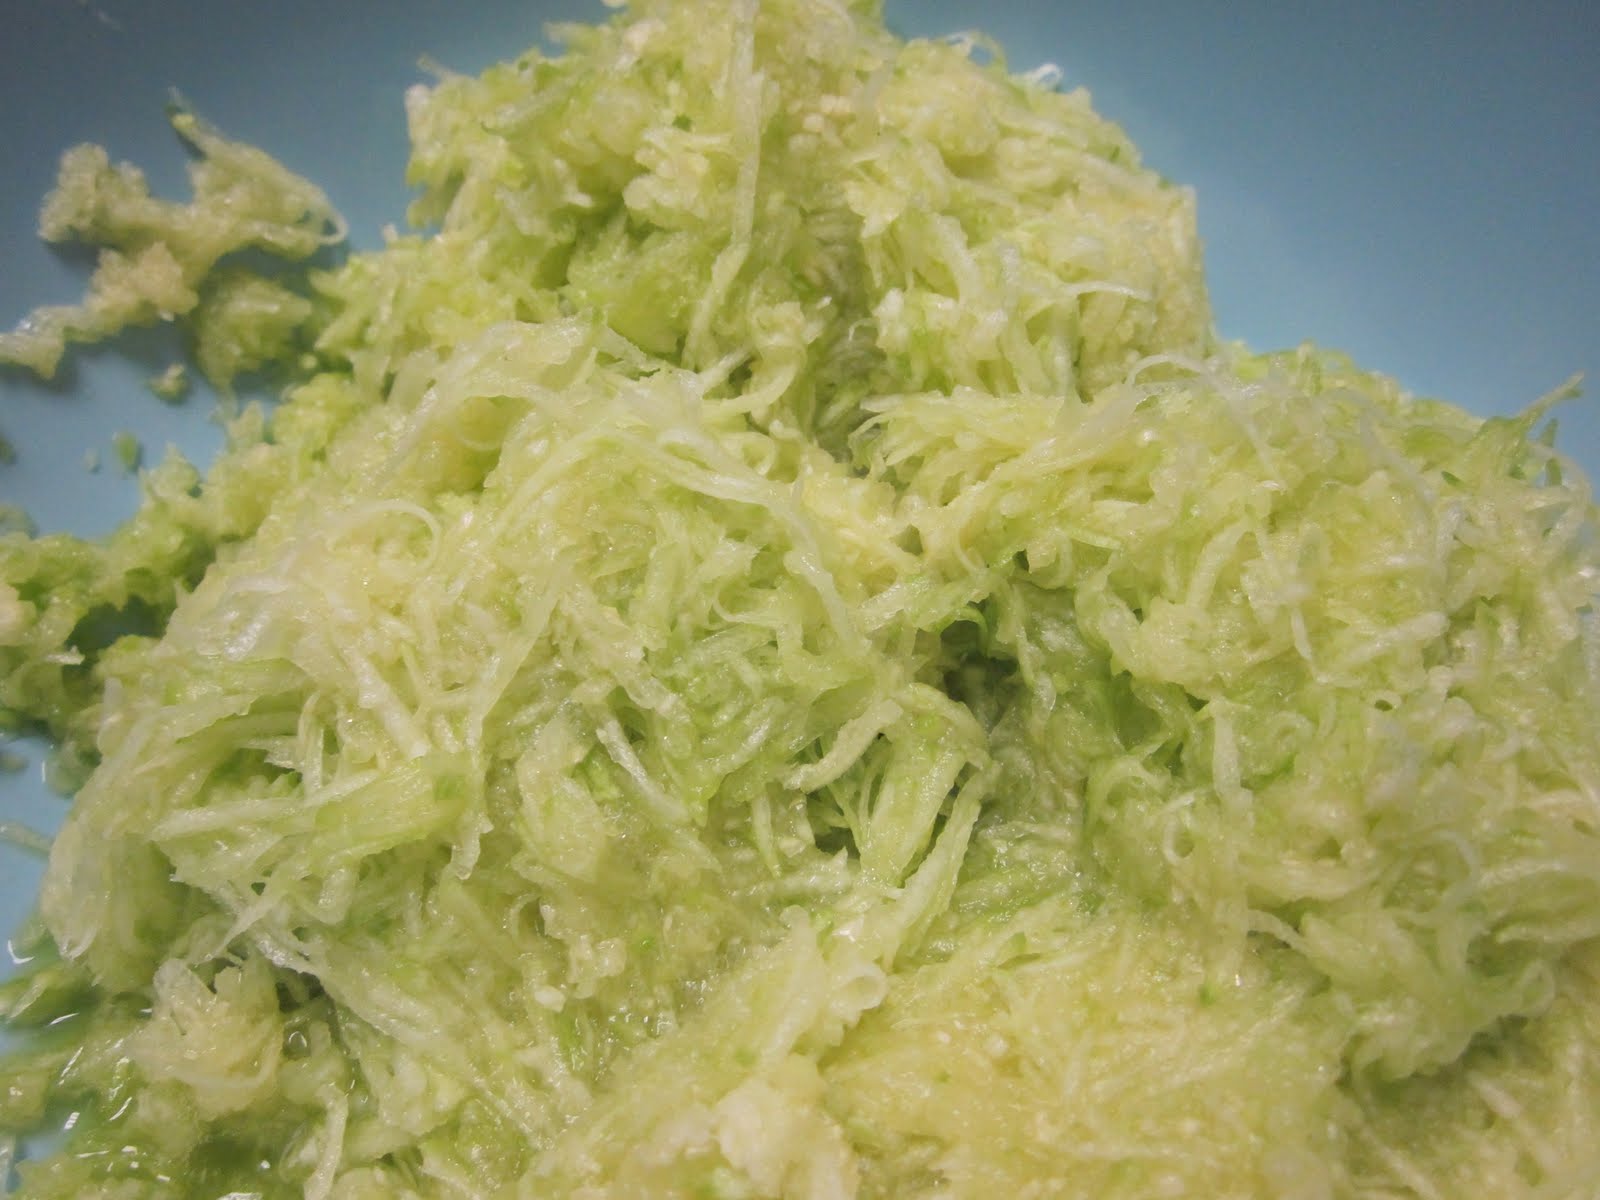
The recipe calls for 2 cups of zucchini. I had no idea how many zucchinis equal 2 cups, so I bought three. After I began shredding, I realized that 2 - 2.5 zucchinis looked like 2 cups. They also look a lot like chopped cabbage, which was a tad confusing.


After sifting the dry ingredients and mixing them with the wet, I added the shredded zucchini to the tasty pool. The zucchini blended in well, which is good because I don't want people thinking I'm serving them cabbage bread.


Then it was on to the pans to bake. The recipe called for two 8x4 pans, but I'm pretty sure mine were 9x5. I could have measured, but meh.


After about 60 minutes in the oven, the zucchini bread was done! You may notice some sugar on top--I added some raw sugar halfway through the cooking time because that's when I remembered I wanted to add some sugar on top.


Unfortunately for one of the loaves, I forgot to flour the pans in addition to greasing them and there was a slight casualty when moving to the wire rack.


On the plus side, the loaf tearing in two made it easier to justify eating some right away. And it was DELICIOUS. The zucchini bread was incredibly moist and flavorful without being too sweet. One of the great things about this bread is its longevity. It really did taste better the next day, and just as good a day after that. I put the prettier bread in the freezer to serve to visiting family members next month.

I forgot to mention the best part of making zucchini bread--I found something my mother-in-law has never made! My mother-in-law is a wonderful cook and fantastic baker, so it's kind of nice to have made something that my husband can't compare to his mom's version.


Recipe, adapted from Mom's Zucchini Bread

1 1/2 cups all-purpose flour
1 1/2 cups whole wheat flour
1 teaspoon salt
1 teaspoon baking soda
1 teaspoon baking powder
3 teaspoons ground cinnamon
1 dash pumpkin pie spice
3 eggs
1 cup vegetable oil
1 1/2 cups white sugar
3/4 cups brown sugar
3 teaspoons vanilla extract
2 cups grated zucchini
Turbinado sugar

Grease and flour two 8 x 4 inch pans. Preheat oven to 325 degrees F.

Sift flour, salt, baking powder, soda, cinnamon, and pumpkin pie spice together in a bowl.

Beat eggs, oil, vanilla, and sugar together in a large bowl. Add sifted ingredients to the wet ingredient mixture, and beat well. Stir in zucchini until it blends into the batter. Pour batter into prepared pans.

Bake for about 60 minutes. Cool in pan on rack for 20 minutes, then remove bread from pan to cool on wire rack.

                                      Thursday, September 9, 2010

                                      CEiMB -- Baked Falafel Sandiwches

                                      I've been a bad, bad blogger. No reason except that I've been reading up a storm and I just started to learn how to knit (I am horrible right now, but I love it). But I really have been cooking (and baking) away at home! I promise to catch up on posts very soon.

                                      Now on to the food and my first Craving Ellie in My Belly post for September! This week's recipe was Baked Falafel Sandwiches and hosted by Elina of Healthy and Sane (healthy and sane, that is something I strive for). I was very excited to make this recipe because I love me some falafel. When I studied in Melbourne (in Australia, not Florida), my friends and I used to frequent kebab shops after a night at the bars. Since I was a vegetarian at the time, I stuck with falafel and it always brings back good memories.

                                      Despite the number of ingredients, this recipe was quite easy to put together. It starts off with chickpeas, onion, garlic, parsley, cilantro, coriander, cumin, salt and olive oil in a food processor. I quickly learned that my mini food processor doesn't really cut it for things like this, but I made it work.


                                      After combining the main ingredients in the food processor (20 seconds, I don't think so, Ellie!), time to make the falafel. The mixture was moist, but not super sticky so it was pretty easy to form 16 falafel balls and plop them onto a baking sheet sprayed with olive oil. I used my Misto olive oil sprayer to spray olive oil over the falafels rather than brushing them. Yeah lazy! Or efficient. Definitely efficient.


                                      While those hung out in the oven for 40 minutes (turning halfway through), I worked the tahini sauce and "salad." I learned that tahini is not the cheapest ingredient out there, but I have a large container of it and I will find other ways to use it. The tahini sauce was very easy--tahini, lemon juice, and water stirred until mixed into desired sauce consistency.


                                      The "salad" consisted of lettuce, seeded diced cucumber and tomato. Unfortunately, my tomatoes decided to grow Santa Claus like beards so I had to toss them. Ho Ho...not in my falafel sandwich, so I stuck with lettuce (I used a salad mix because I had it on hand) and cucumber.

                                      To put the sandwiches together, I toasted pita pockets in the oven, split them, and filled with tahini sauce, salad, and falafel. That's it--so easy!


                                      That picture doesn't really look like falafel, but I was too anxious to try it to take another one.


                                      I made C2 stop eating for a moment to let me take a picture of his half-eaten falafel. He enjoyed it as much as I did, though we both thought the sandwiches were definitely filling. I'm hoping the falafel reheats well because we have enough leftover for dinner tomorrow as well.

                                      Thursday, August 26, 2010

                                      Buttermilk Baked Chicken

                                      I had some leftover buttermilk from the CEiMB Mixed Berry Cobber recipe and thought I might give buttermilk fried chicken a try. Except I didn't actually want to fry anything, so I figured I'd try a buttermilk baked chicken recipe. I saw a few different recipes online, but decided to wing it since I didn't have a lot of the listed ingredients.

                                      While I preheated my oven to 375F, I prepped the chicken by pounding it to an even thickness (even thickness = more even cooking). Then it was time for the coating. I used Italian seasoned bread crumbs, since I had them and was too lazy to make my own, and added in some grated Parmesan cheese.


                                      I've said it before, and I'll say it again--mmmmm, cheese. Before the chicken could mingle with the crunch coating, it had to take a bath first. A bath of buttermilk and tabasco, not something I'd recommend for a person. After dipping the chicken in the bath, I then moved it into the breadcrumbs, then onto a baking sheet I sprayed with cooking spray.


                                      The chicken cooked pretty quickly. After putting it into the oven, I didn't do much other than flipping it after ten minutes. I definitely overcooked the chicken--I guess all the news reports of salmonella eggs made me a bit of a fraidy cat cook. Luckily it was still edible and even tasty, just a tad on the dry side. If I made this again, I'd definitely whip up some kind of dipping sauce.


                                      I'm going to be playing around with the blog formatting for the next few posts to see what works and looks best for me. But I'll still be cooking, and eating!